Learn

How to use Mosaic Voice

Step-by-step guides for caregivers, families, and speech therapists— matched to the app as it works today.

Video placeholder

App overview video — full walkthrough (coming soon)

Getting Started

3 articles covered

Overview01

Welcome to Mosaic Voice

These guides explain how the app actually works—written for caregivers, family members, and SLPs who will set up the app or teach someone to use it. Use the sidebar to jump to a topic.

  1. 1

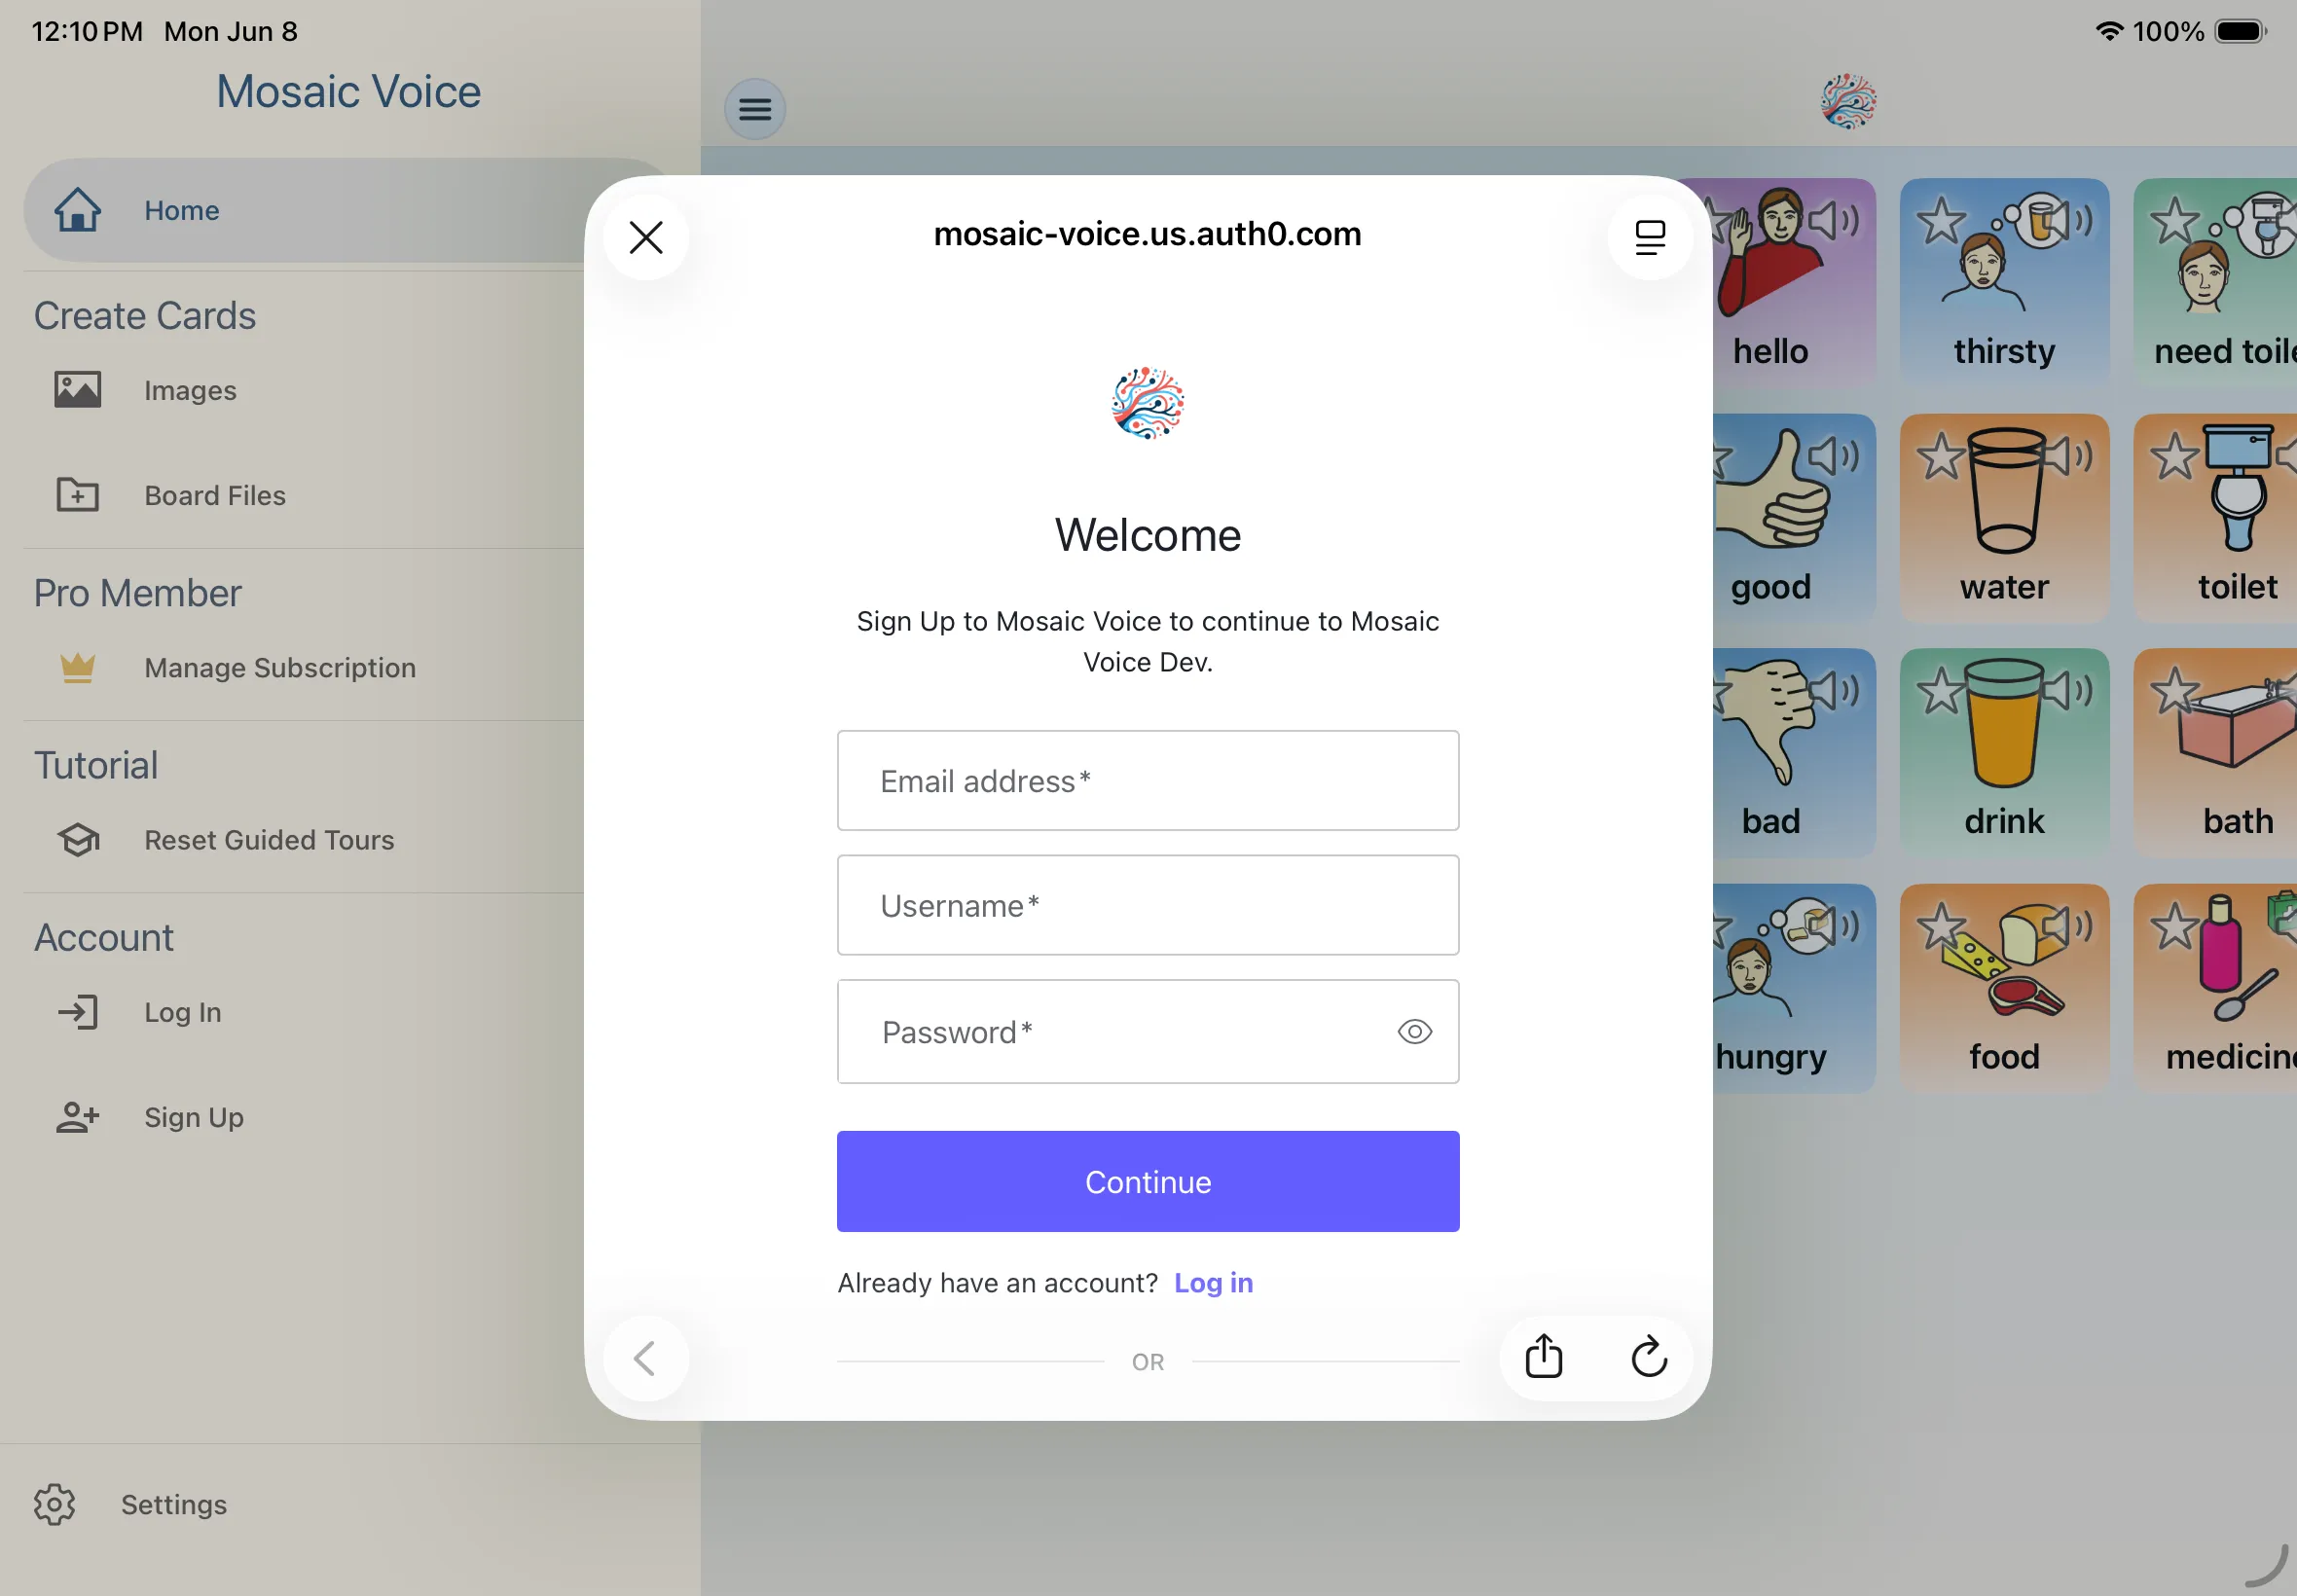
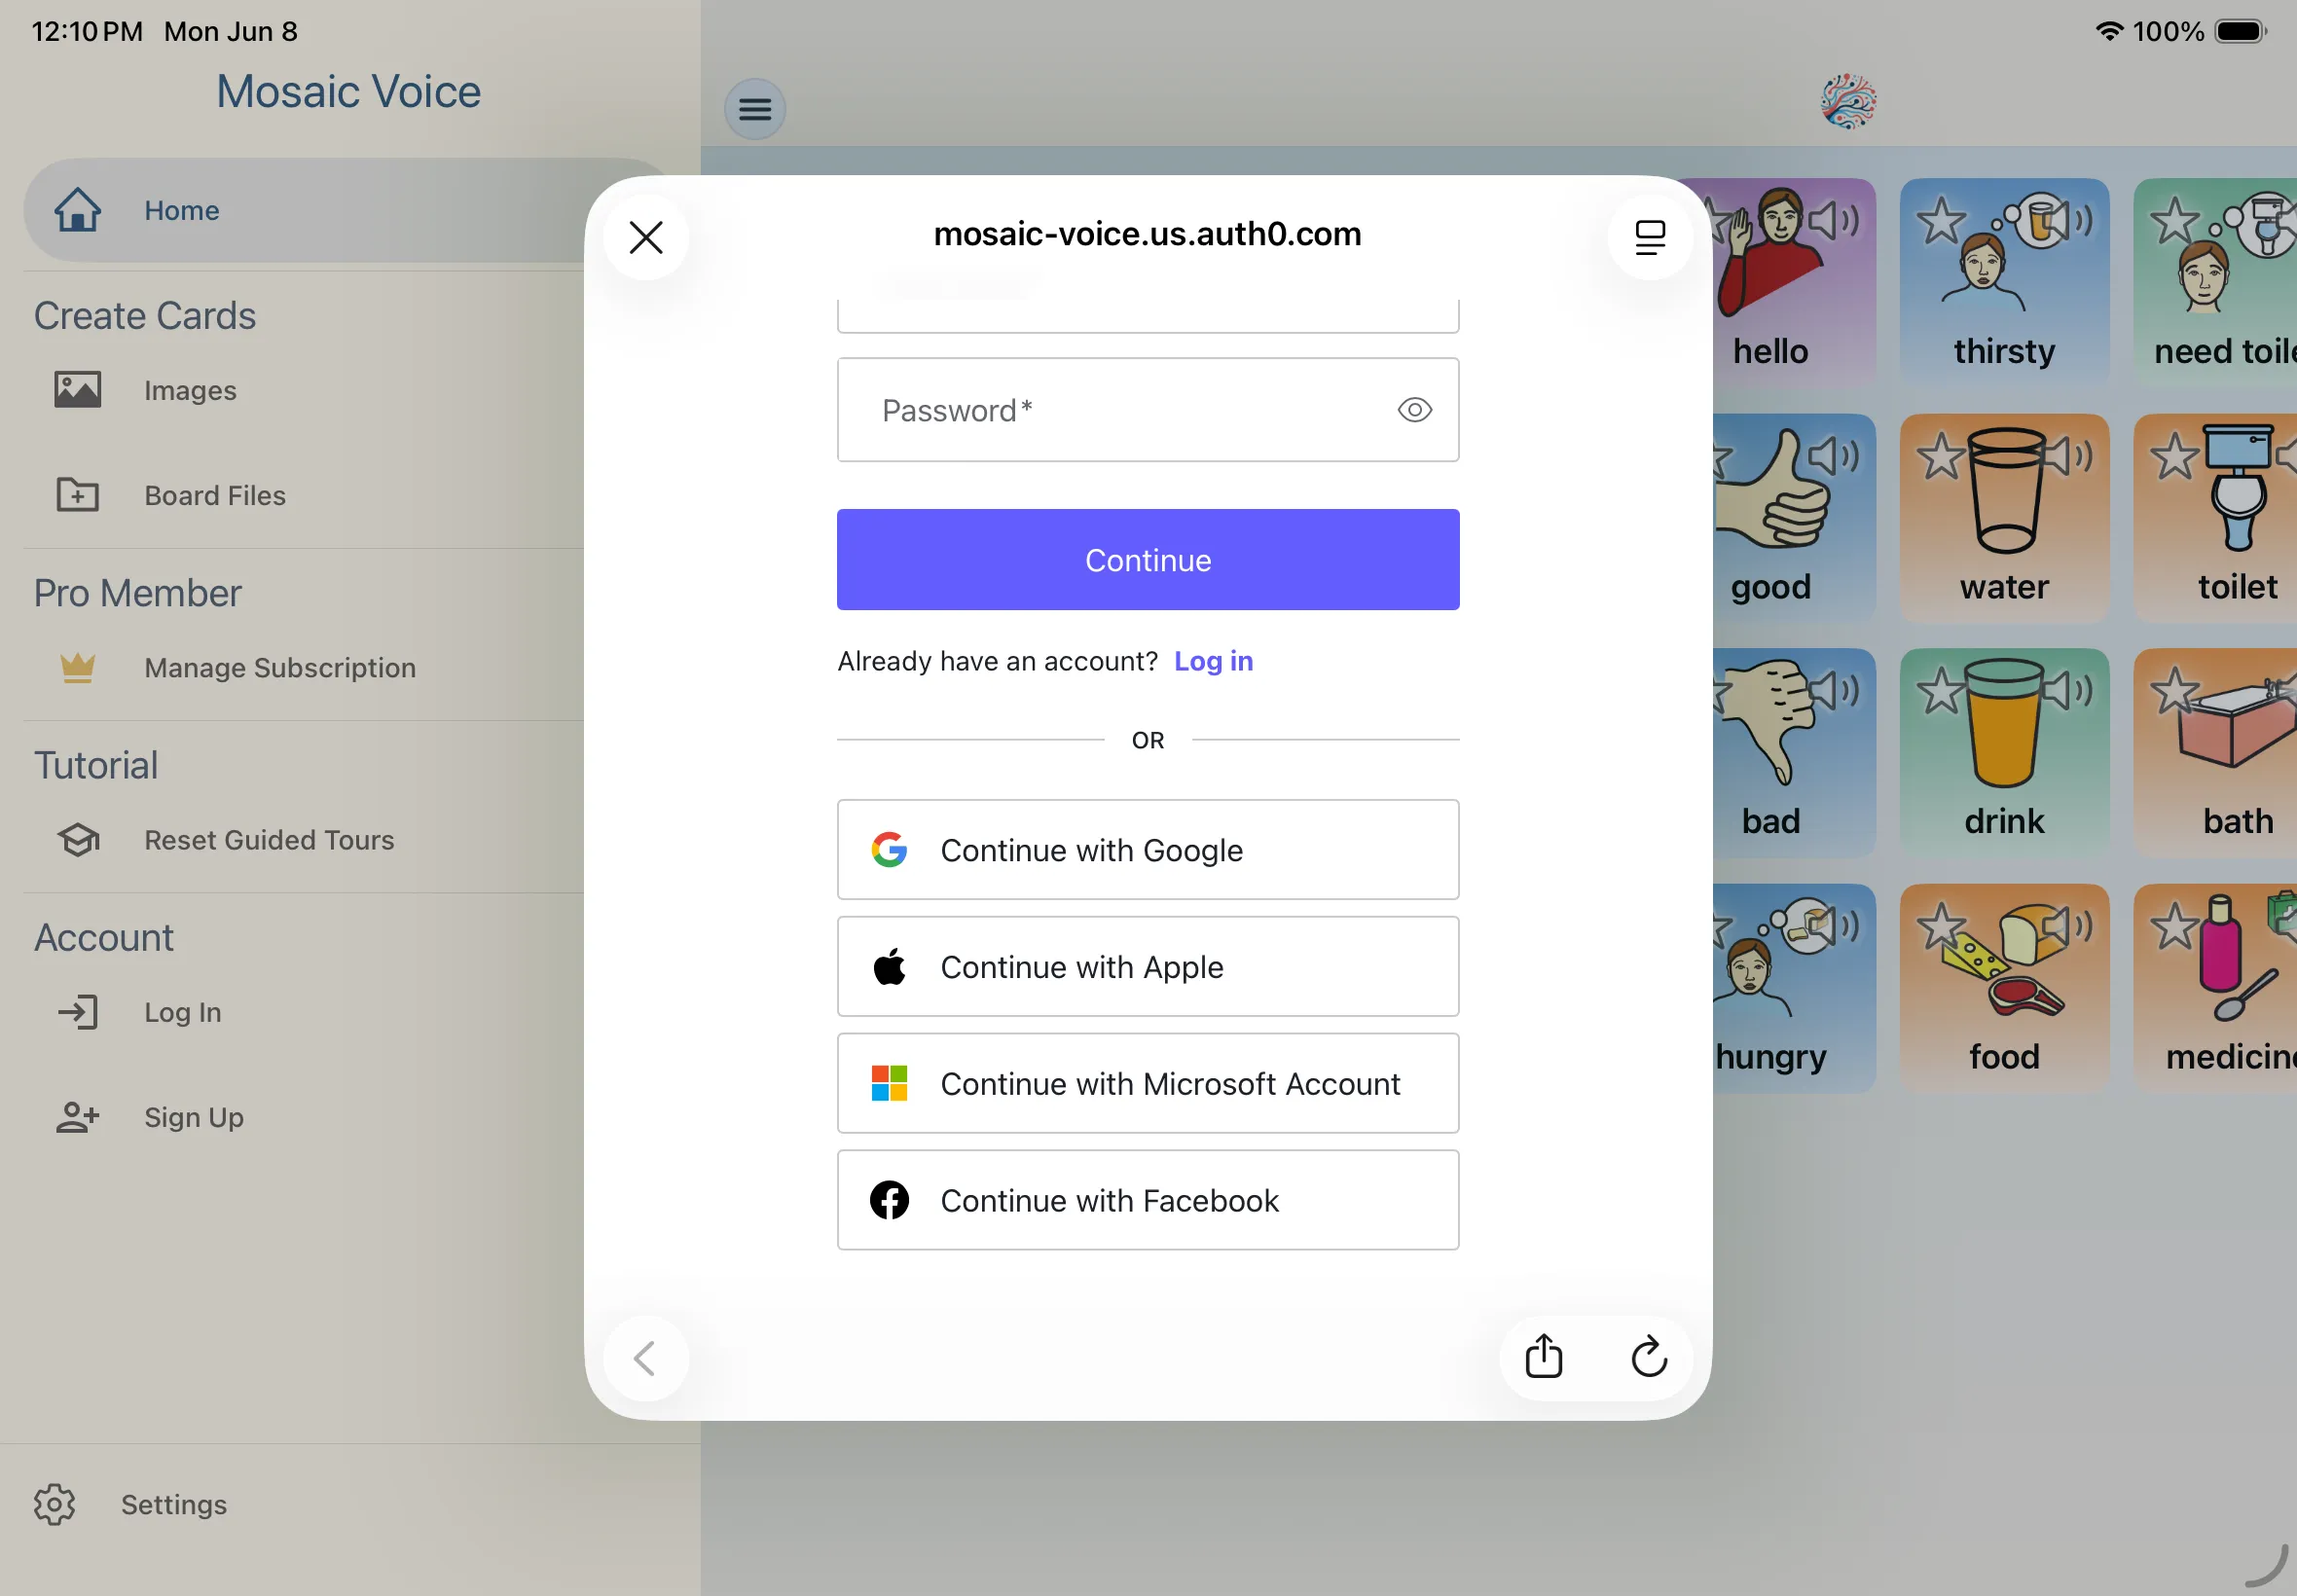
    Sign in as the caregiver

    Use Log In or Sign Up from the side menu. Many setup actions (creating cards, importing boards, generating sentences) require an account.

  2. 2

    Complete your own profile first

    New accounts are asked for birthday and gender on the Complete Your Profile screen. That applies to your self profile, not child profiles.

  3. 3

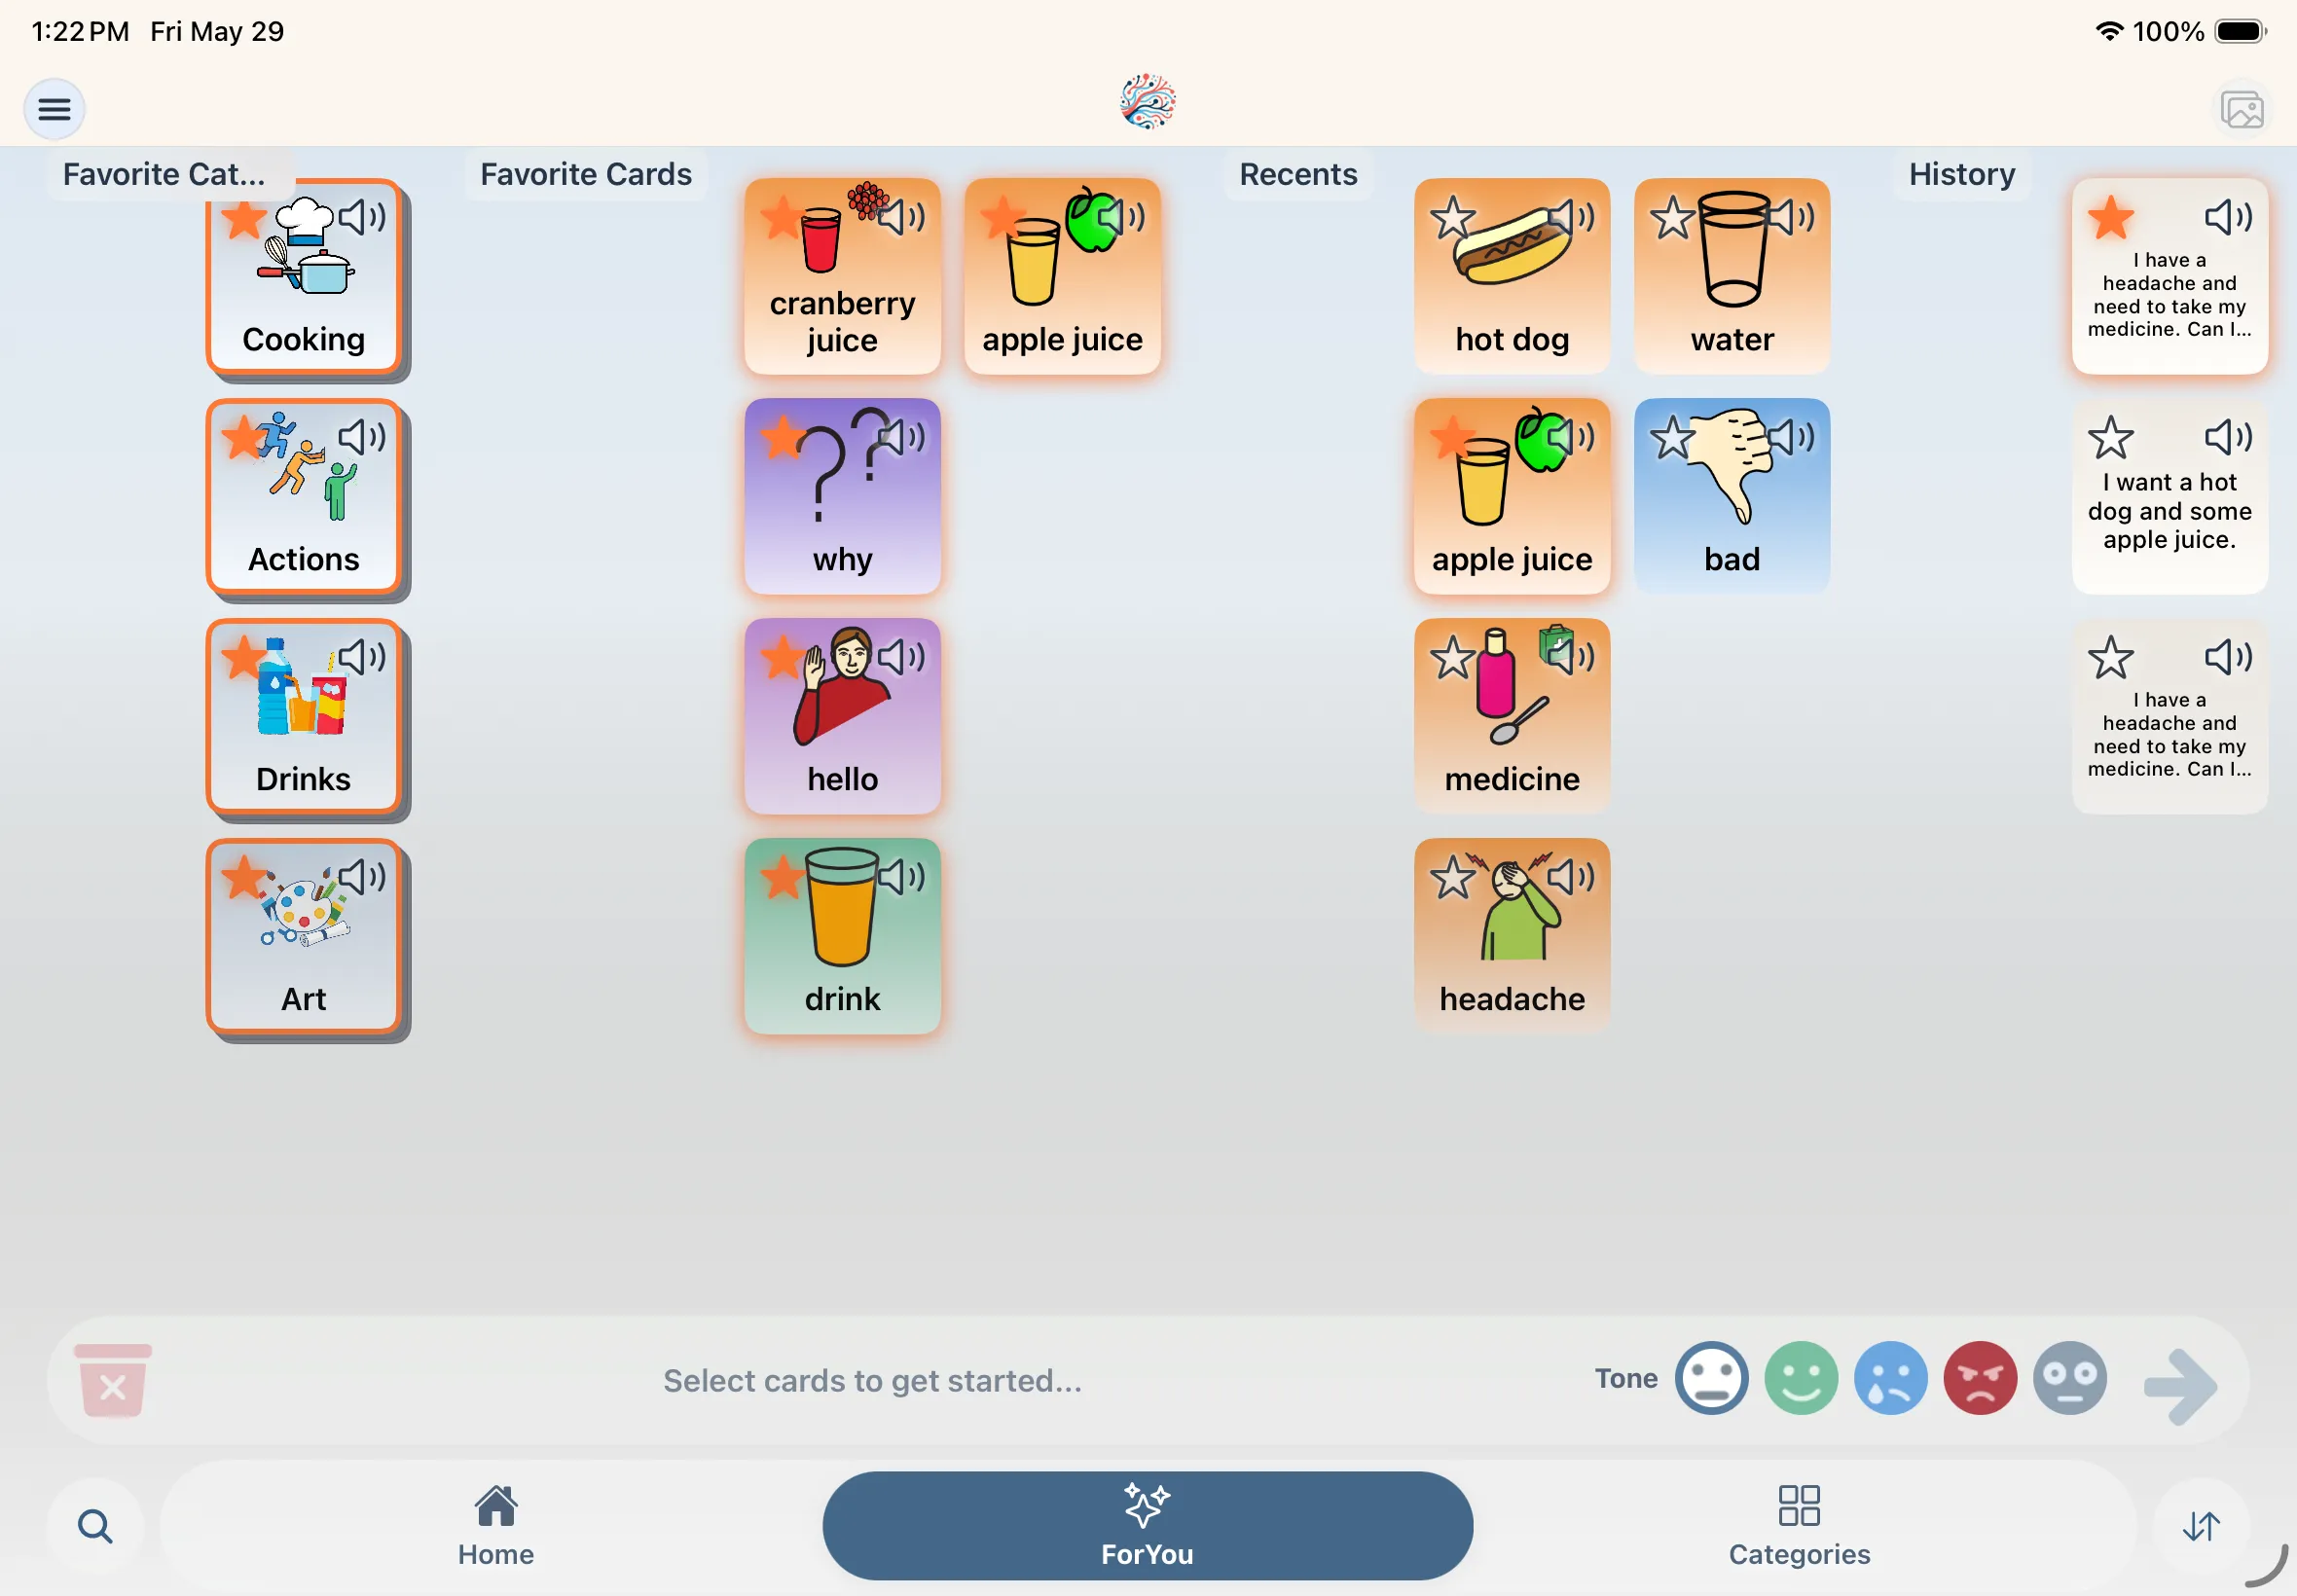
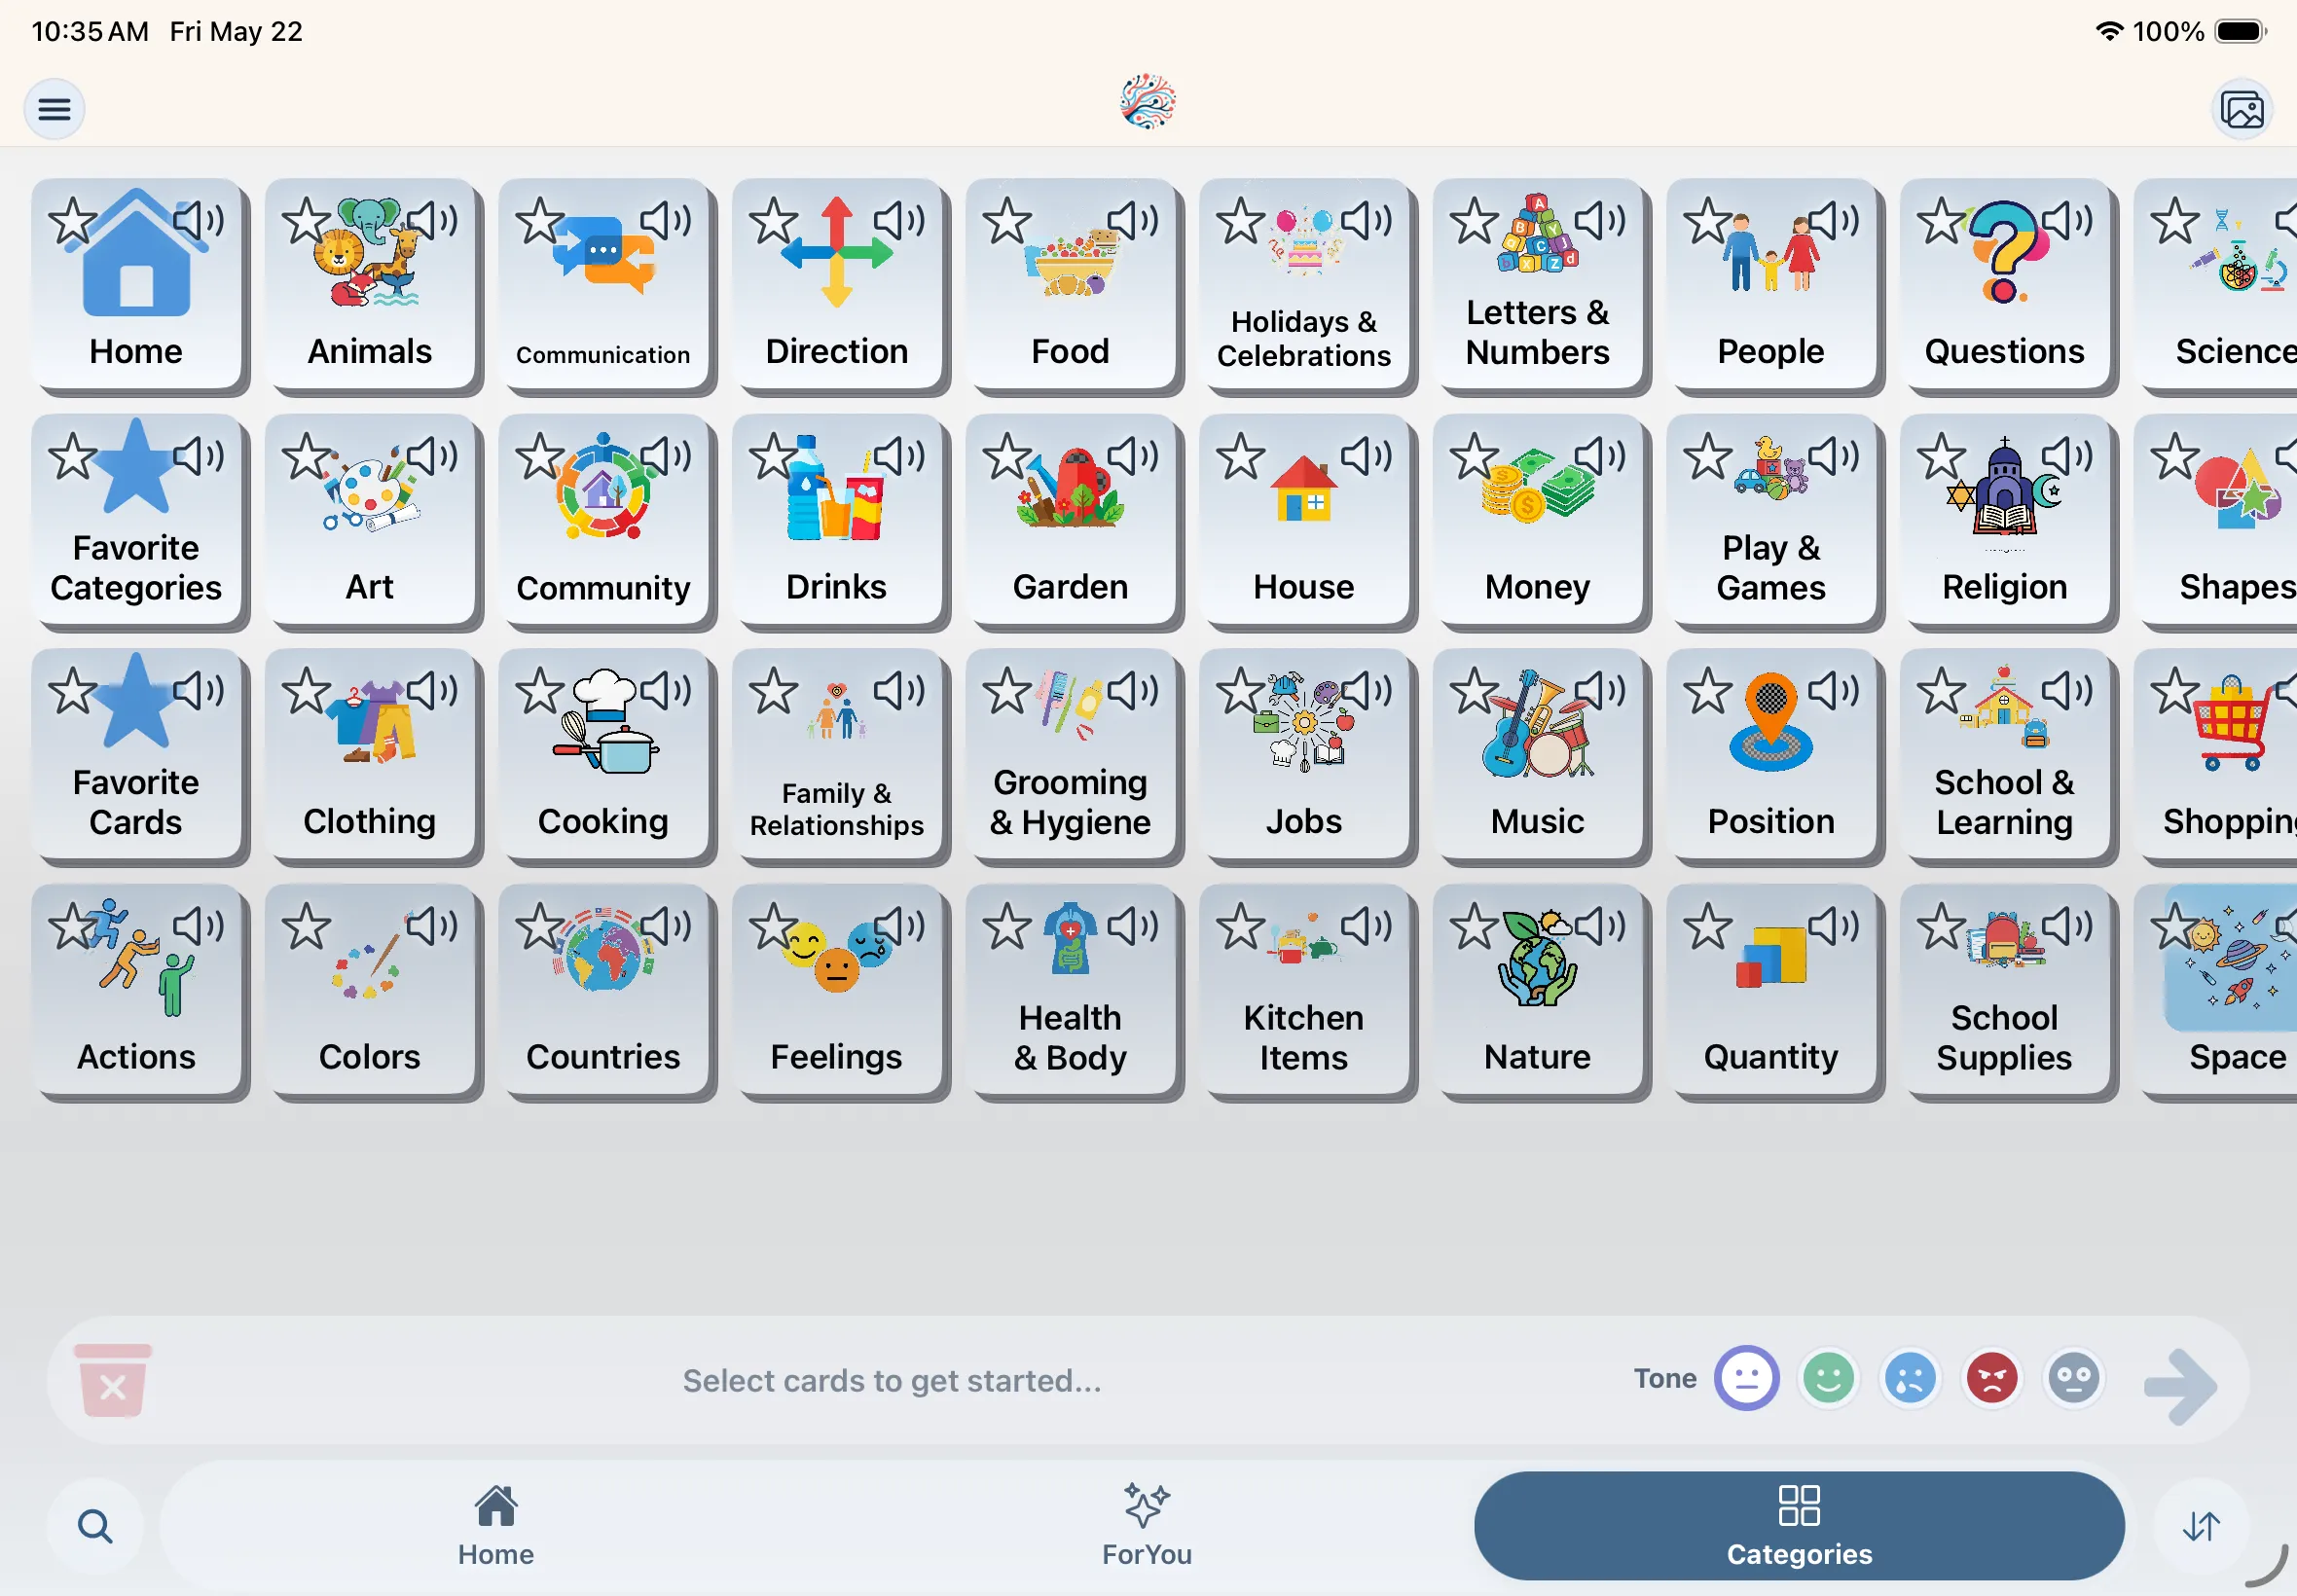
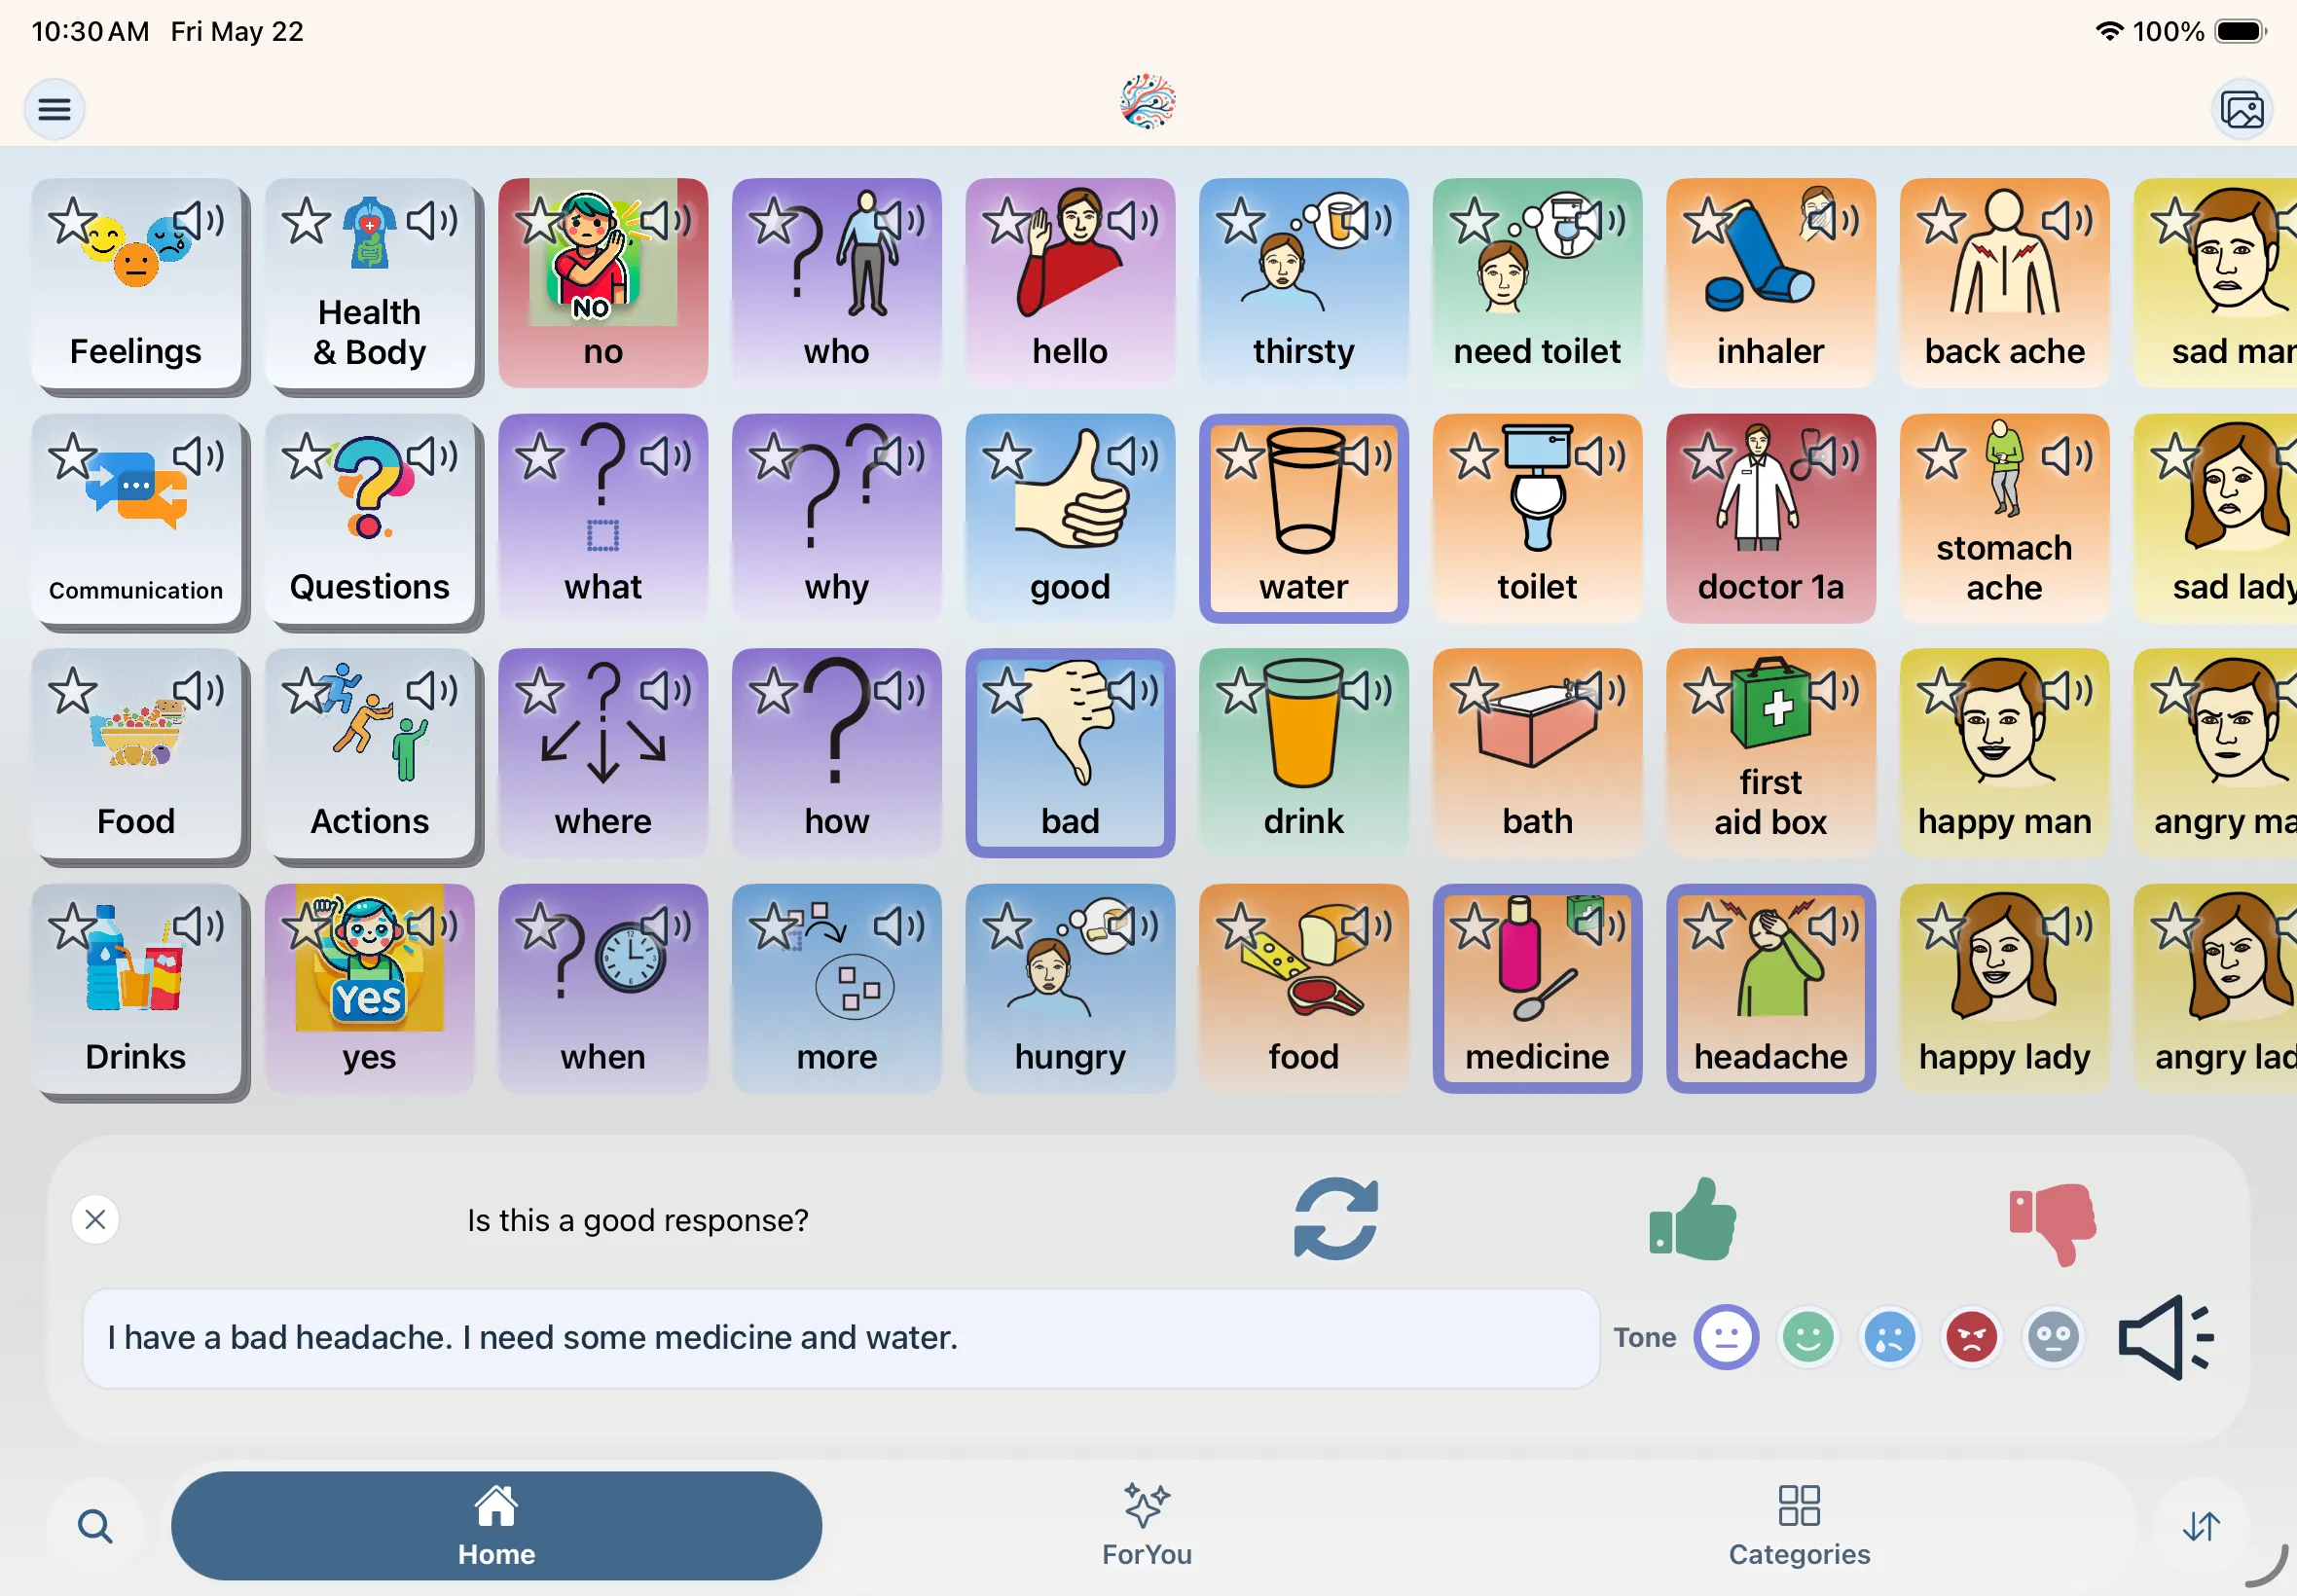
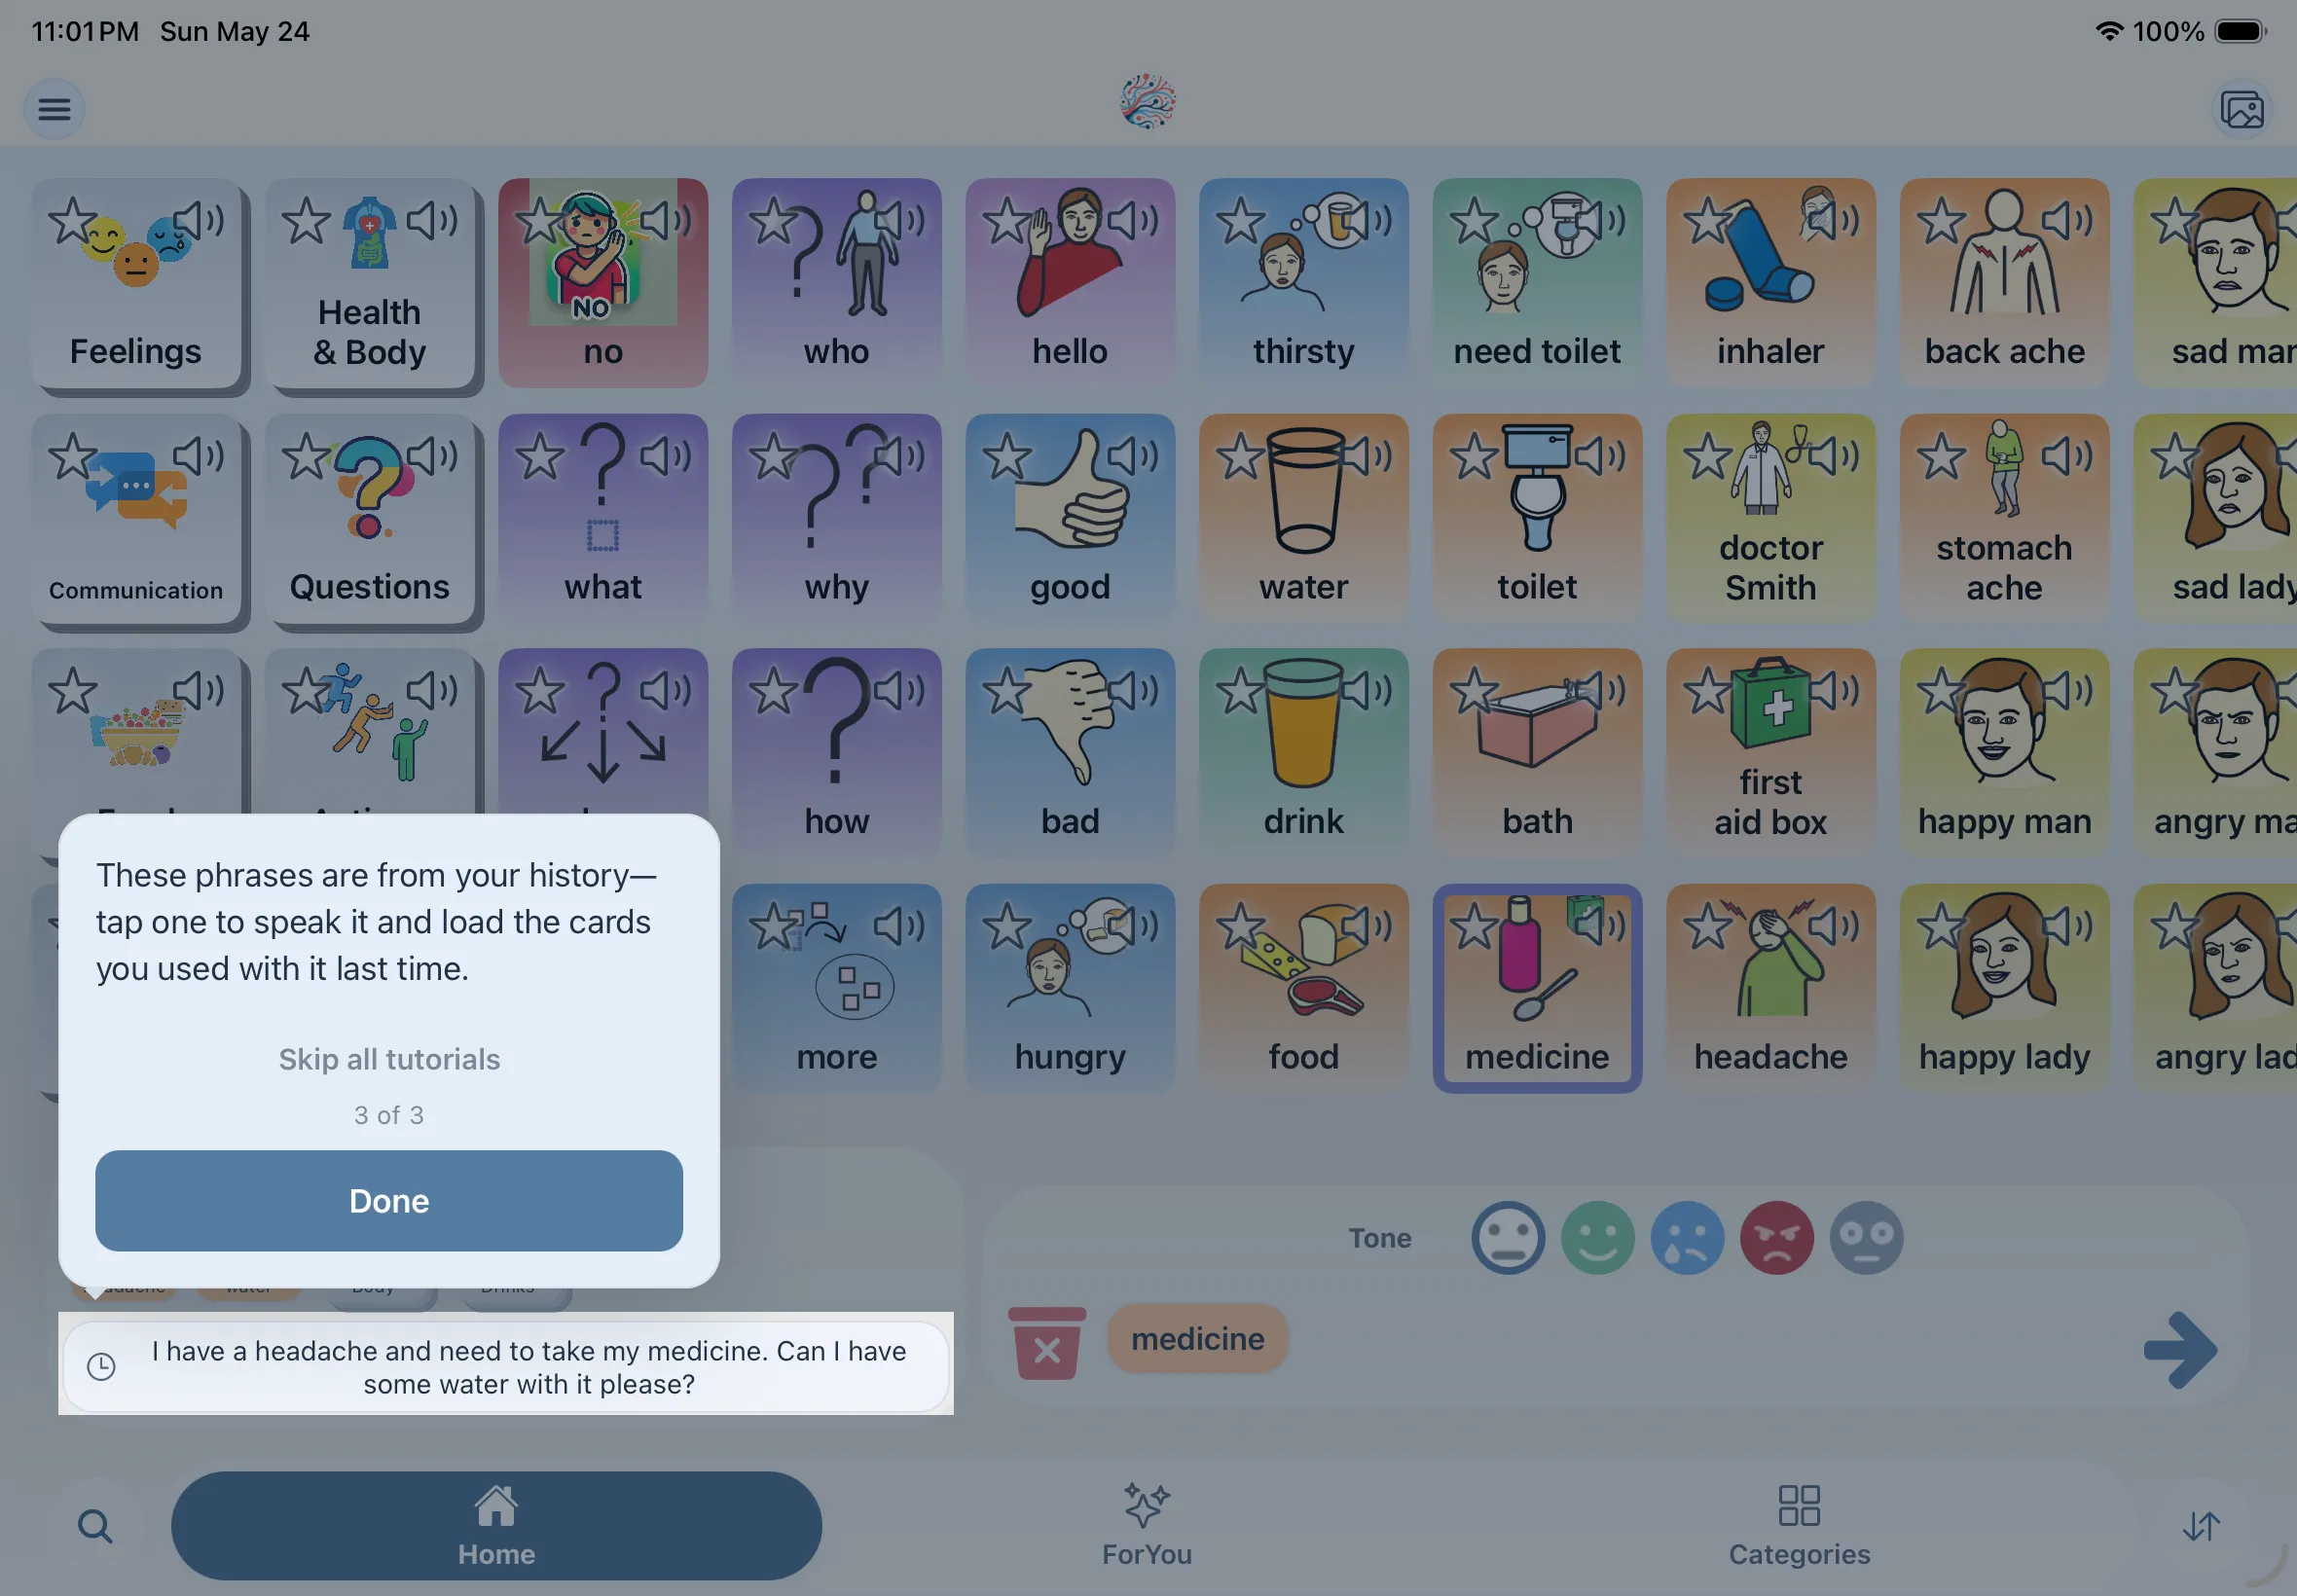
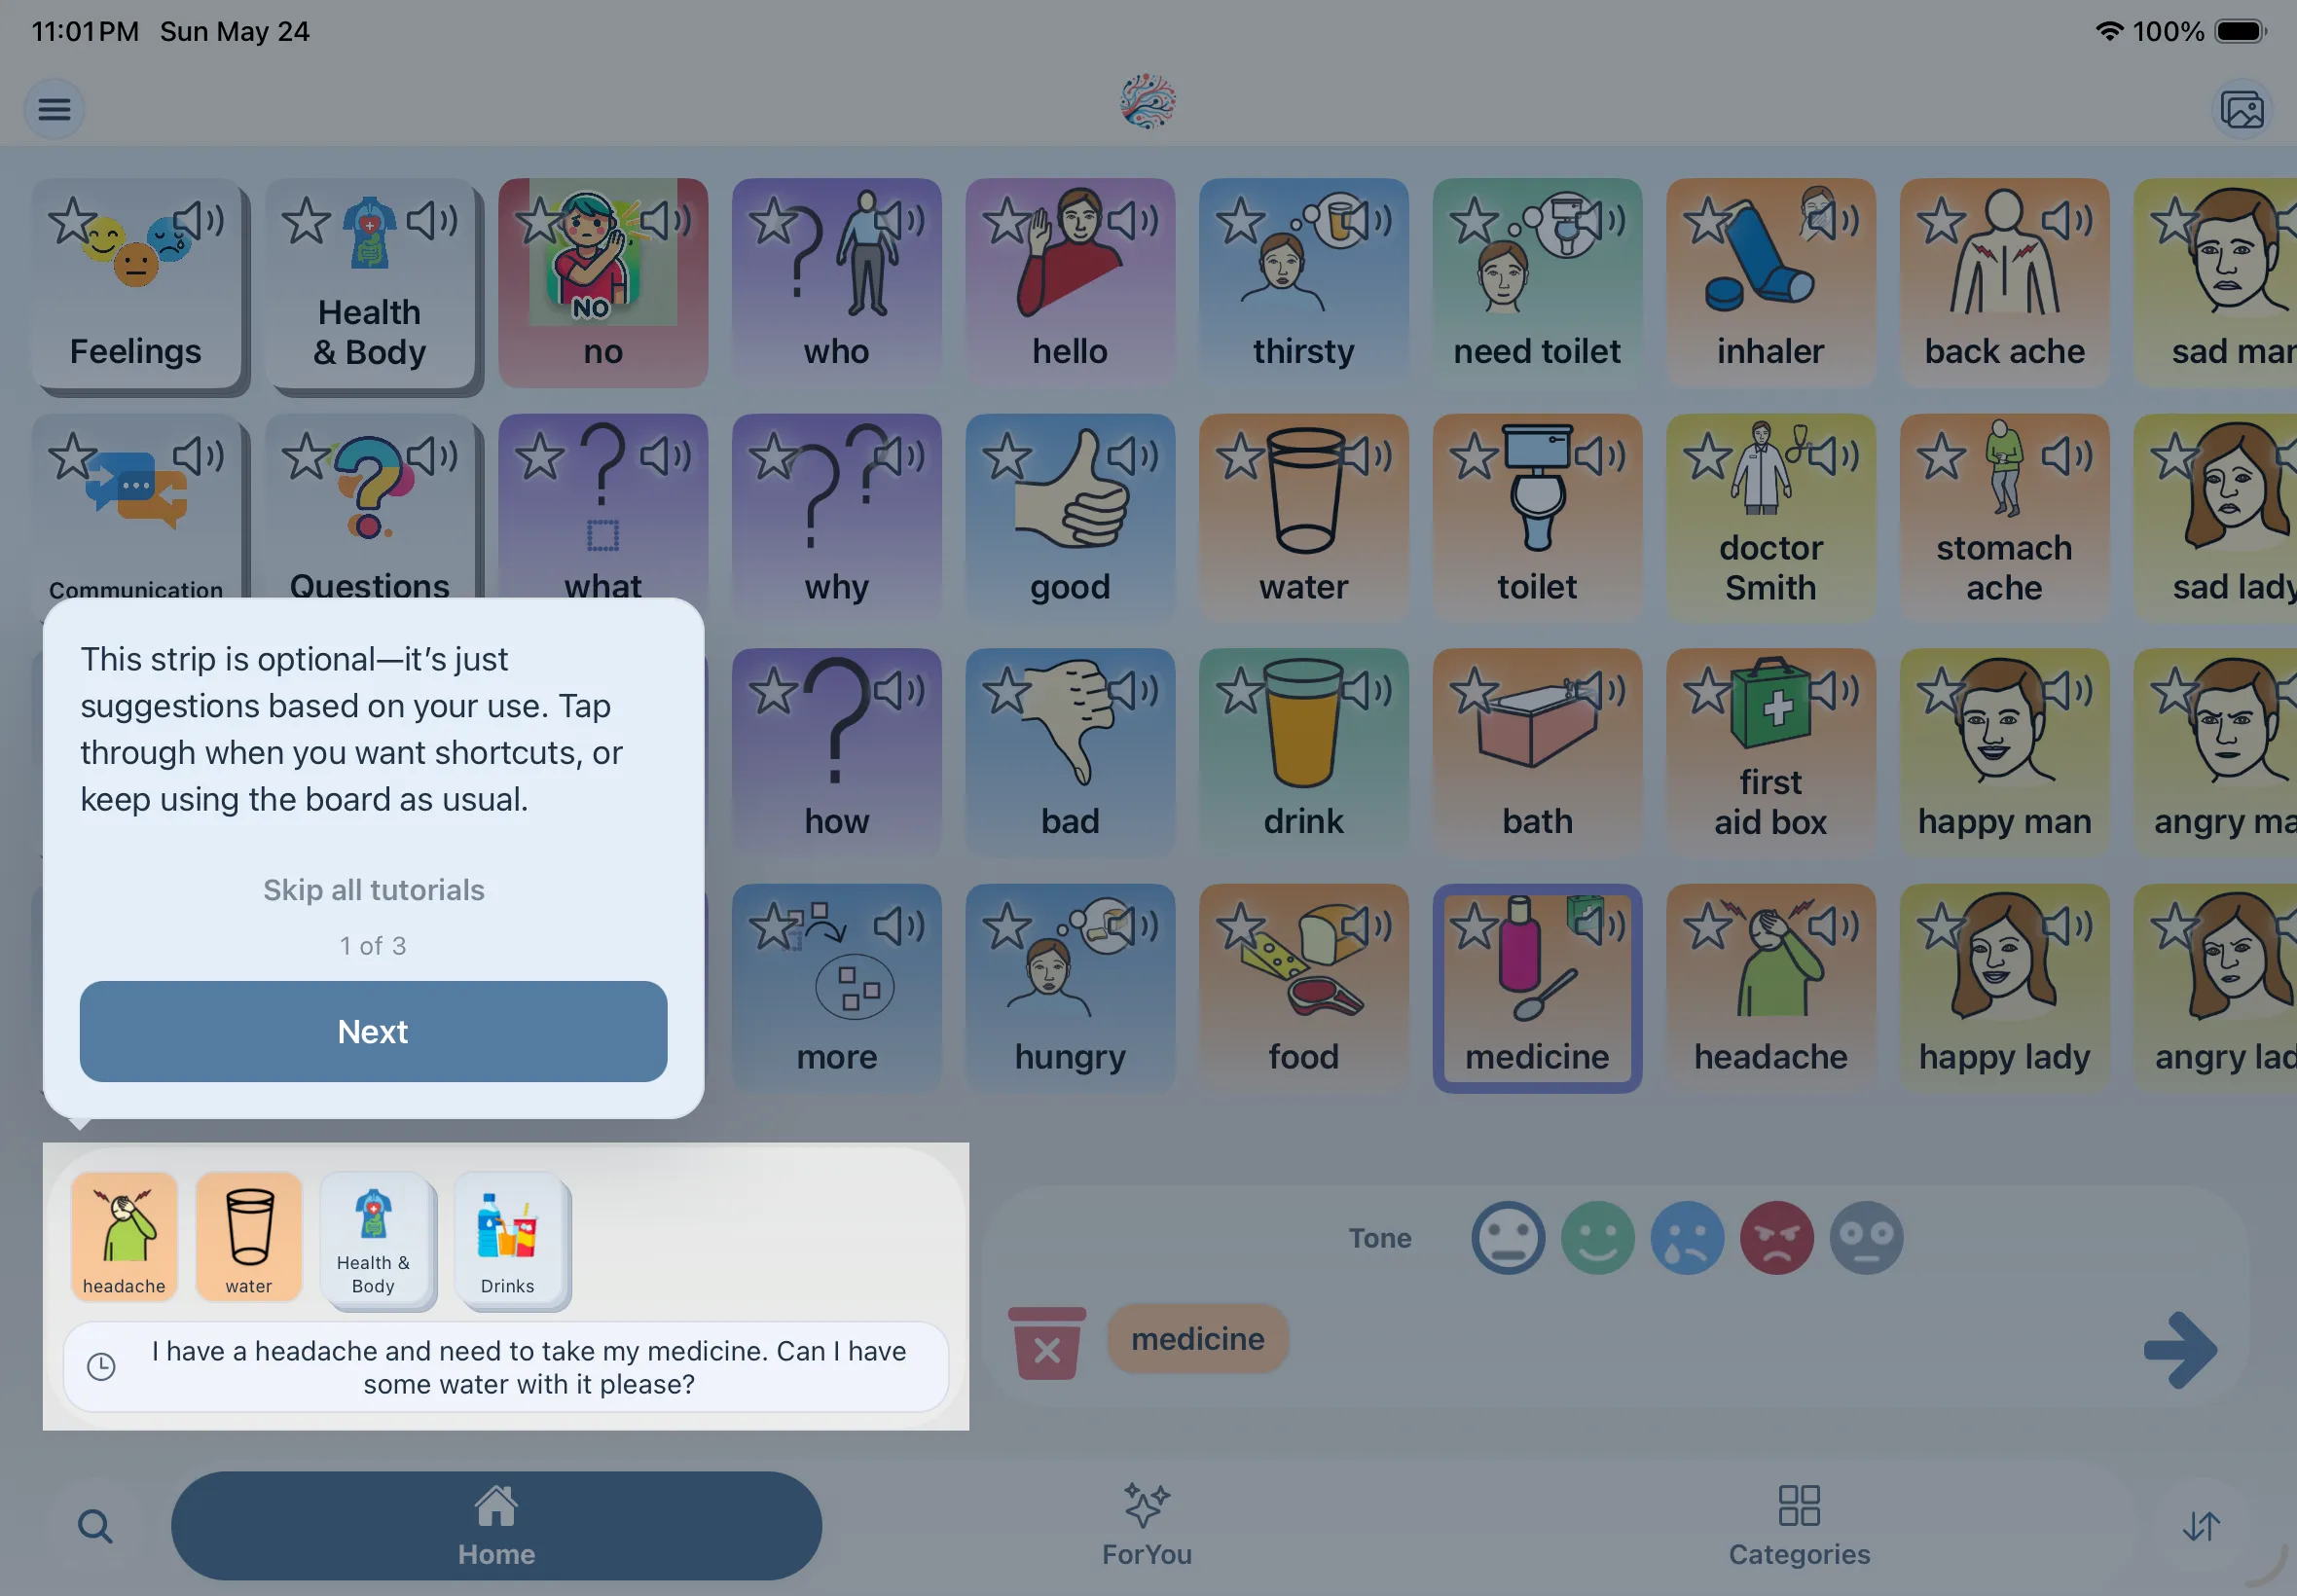
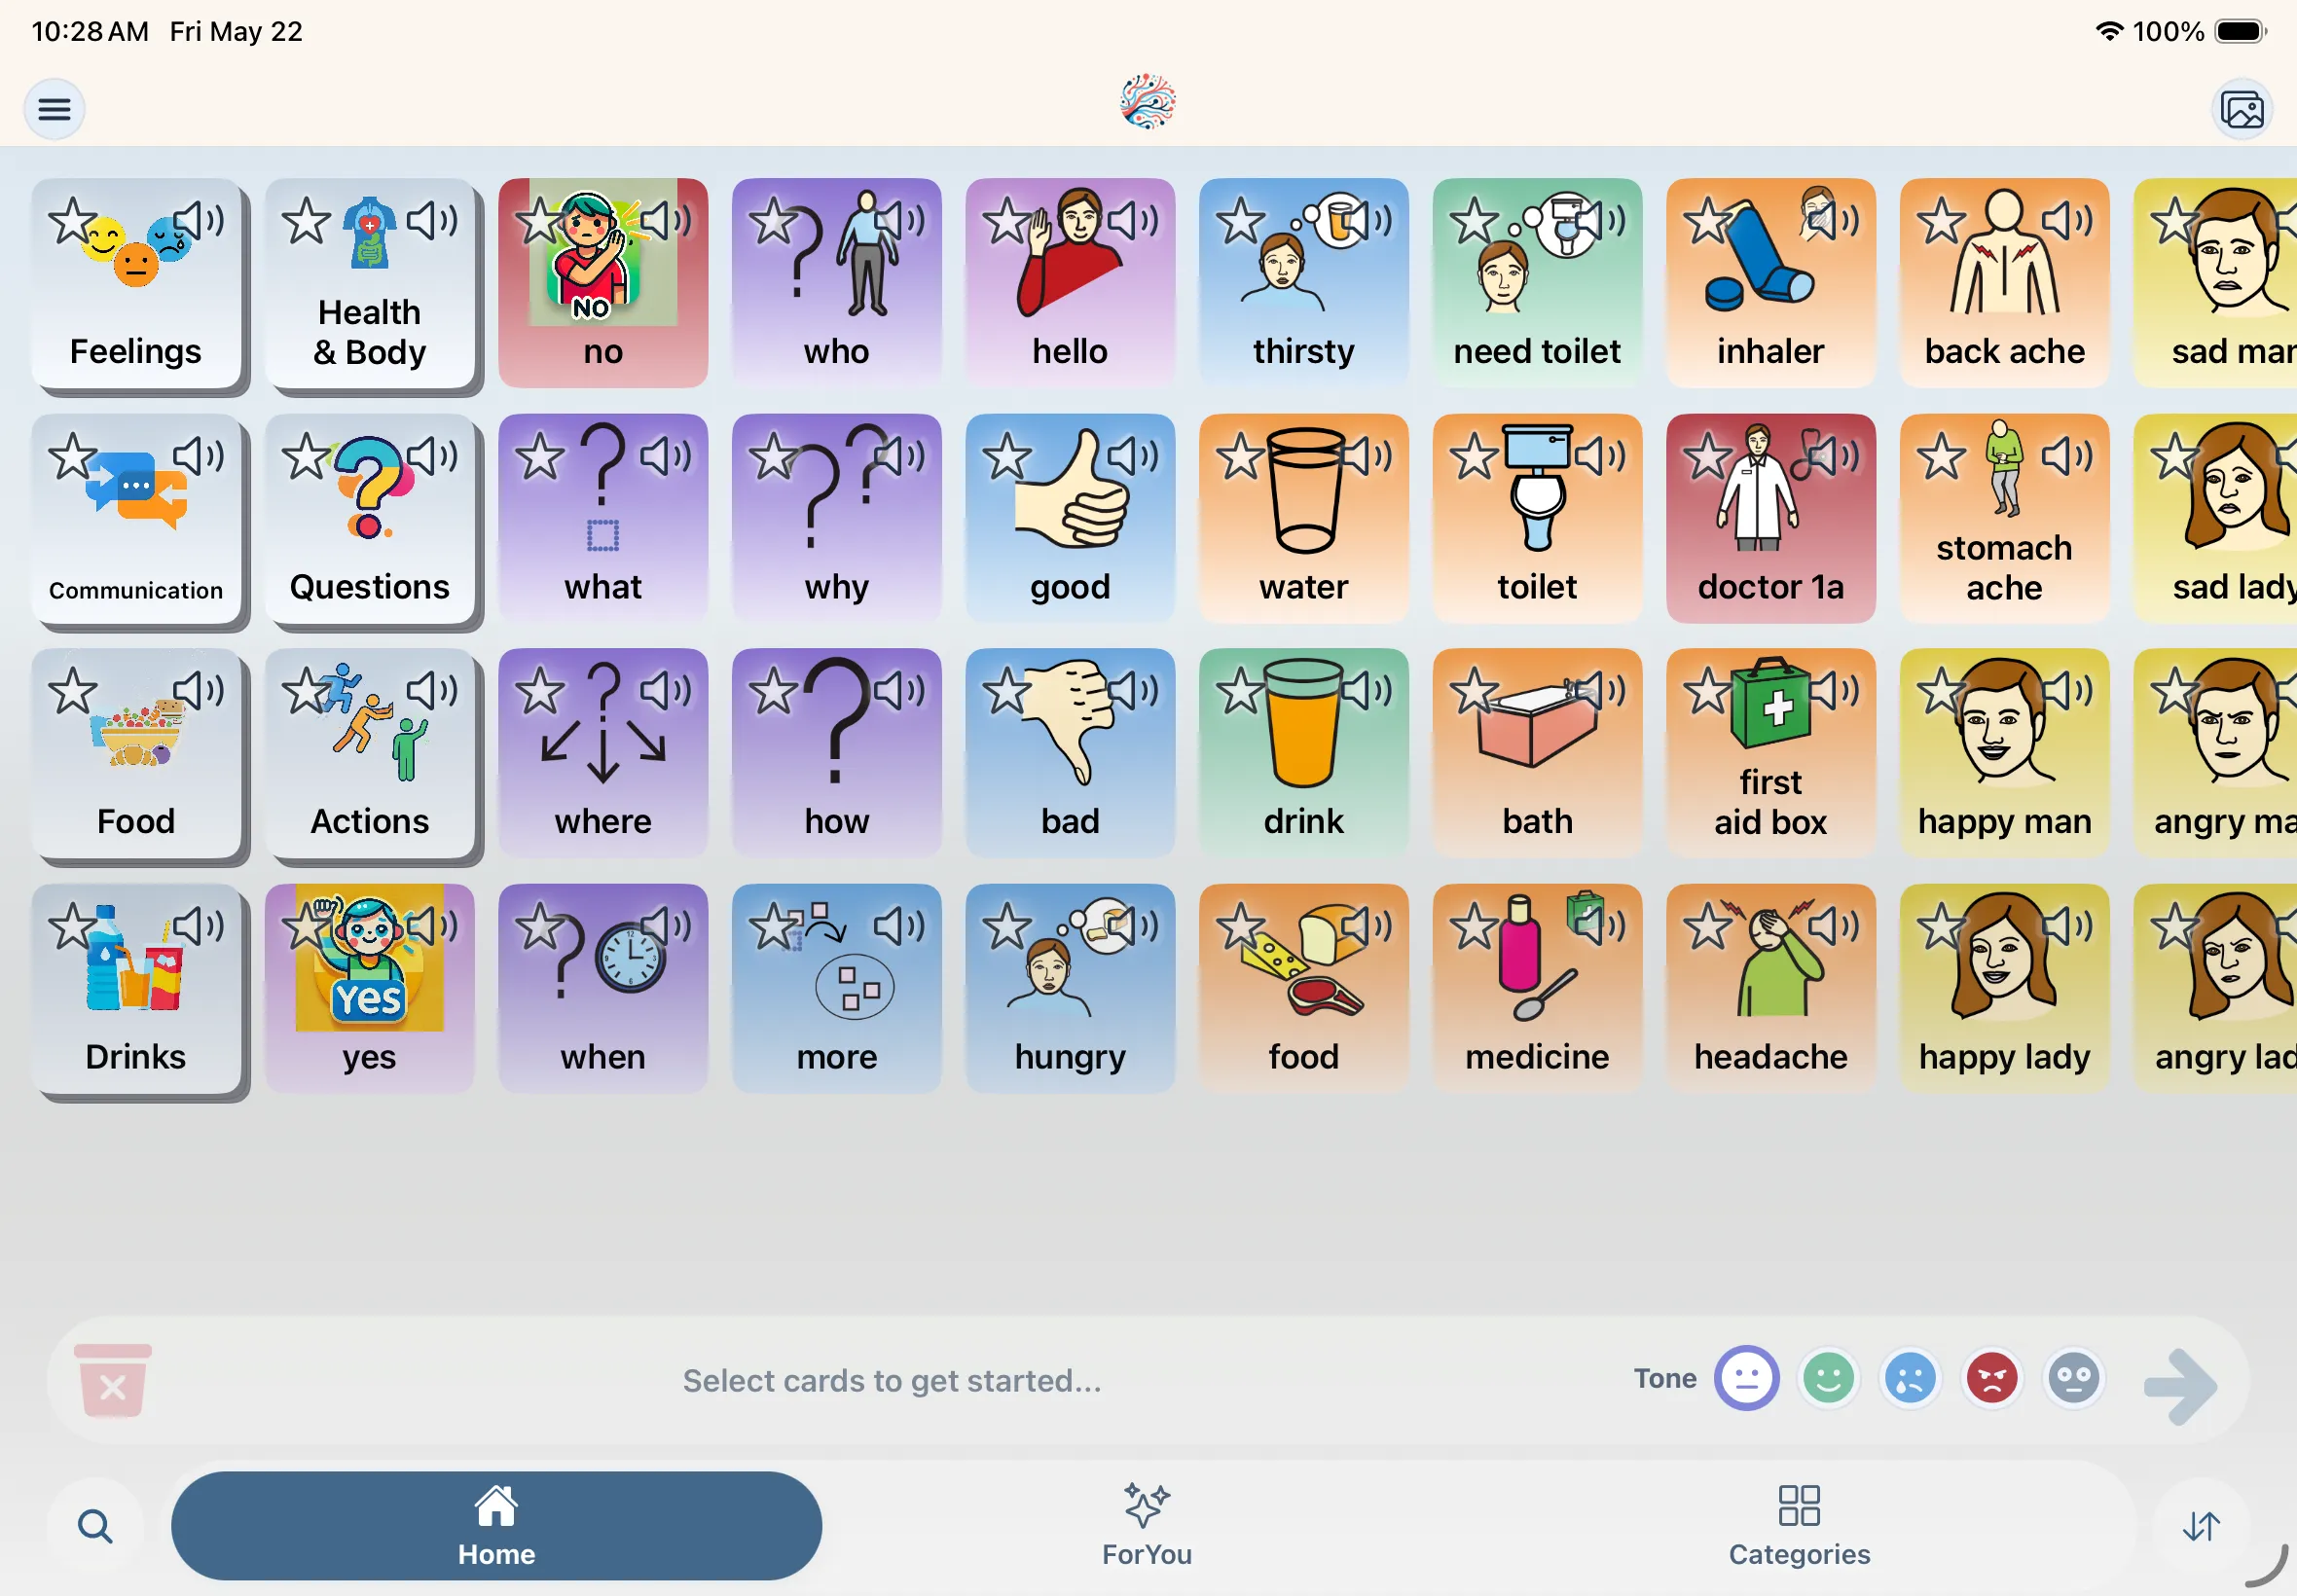
    Learn the bottom dock

    Daily communication happens on the Home grid with the bottom dock: tabs, search, selected-card pills, tone, and sentence generation.

Slideshow placeholder

App overview — Home, dock, and grid

Sign-in02

Sign-in & profiles

Mosaic Voice uses Auth0 for login. After sign-in, the app loads your profiles and may send you to Complete Your Profile if your self profile is missing required fields.

  1. 1

    Log in or sign up

    Start from the side menu, then sign in and wait while your account loads.

    Open the menu

  2. 2

    Complete Your Profile (self only)

    Pick a birthday and gender (Male, Female, Non-binary, or Prefer not to say), then tap Continue. Age is calculated from the birthday. This screen is for your self profile.

    Complete Your Profile (self only)

  3. 3

    Add child profiles in Settings

    To support someone else, open Settings → Child Profiles. Creating a child profile requires caregiver consent. Use Use Profile to switch who is active.

    Add child profiles in Settings

Tips for caregivers & SLPs
  • Self vs child profiles

    Profiles personalize AI generation (notes, age, gender). Vocabulary on the grid is tied to your account—they are not separate per-profile boards in the app today.

Navigation03

Navigation & layout

The main screen is a communication grid with a top bar for setup shortcuts, plus a floating bottom dock for tabs, search, selection, and speaking.

Home tab

Tips for caregivers & SLPs
  • Top bar (AppHeader)

Daily Communication

4 articles covered

Sentences01

Selecting cards & generating sentences

Tap cards on the grid to build a selection. Selected cards appear as pills in the bottom dock—not as a full sentence until you generate one. AI turns your card choices into a speakable sentence after you pick a tone and tap send.

Selecting cards

Tips for caregivers & SLPs
  • Give feedback often

    Approvals, corrections, and regenerations teach Mosaic what the user intended. The more feedback you give, the better future sentences match what they meant to say.

Tips for caregivers & SLPs
  • Model the two-step flow

    Teach “pick cards first, then generate” rather than expecting a finished sentence in the pill row. Pills are your raw choices; the generated line is what gets spoken as a full utterance.

Predictions02

Predictions & suggestions

Predictions are enabled by default. While you have cards selected, a suggestion strip can appear above the dock with suggested next cards and past generated phrases from an on-device graph learned from your usage. You can turn predictions off anytime from Settings.

Select cards to see suggestions

Tips for caregivers & SLPs
  • Predictions are local

    The strip is powered by on-device co-occurrence data, not a cloud “autocomplete.” It hides during search or reorder, or when the selection is incoherent.

ForYou03

ForYou tab

The dock tab is labeled ForYou (one word). It collects favorites, recently used cards, and generated phrase history—only sections that have content are shown.

  1. 1

    Open ForYou

    Tap ForYou in the center dock pill (sparkles icon) or swipe to that tab.

  2. 2

    Favorite categories and cards

    Star a tile to favorite it (login required). Favorites sync with your account.

  3. 3

    Recents

    Recently used cards from generation appear here so you can tap them back into a selection quickly.

  4. 4

    History

    Past generated sentences appear in History. Tap one to hear it and load the cards that were selected when it was created. You can pin history items.

Tips for caregivers & SLPs
  • ForYou is not editable

    You cannot reorder or edit the grid on ForYou—it is for quick access, not layout changes. Use Home or Categories for board edits.

Customization

5 articles covered

Create

Images01

Creating cards (Images)

Drawer → Images opens a create flow: pick or add a category first, upload one or more photos, then finish each card draft (title required, word type optional) before tapping Create.

  1. 1

    Open Images from the menu

    Drawer → Images. You must be logged in; otherwise the app prompts you to log in or register.

  2. 2

    Choose a category

    Select an existing category from the list, or create a new one. All cards in this session are added to that category. For a new category, turn on In Home if you want it to appear on the communicator’s Home grid.

    Choose a category

  3. 3

    Upload images

    Tap Upload at the bottom to pick photos from your library or camera. Each image becomes its own card draft.

    Upload images

  4. 4

    Finish each draft

    For every card, enter a title and optionally change the word type. Tap Next to jump to the next unfinished draft. Every card must have all required fields filled before Create is available—keep using Next until no drafts are left incomplete.

    Finish each draft

  5. 5

    Thumbnail strip

    The row of thumbnails at the bottom is a quick overview of your drafts. A red border means that card still needs work. Tap X on a thumbnail to remove that draft from the batch.

    Thumbnail strip

  6. 6

    Create

    When all drafts are complete, the button changes to Create. Tap it to save. A new category shows up on the Categories tab and on Home if you chose In Home. Otherwise, new cards appear in the category you selected.

    Create

Board Files02

Importing boards (Board Files)

Drawer → Board Files uses the same create flow as Images, but you upload .obf or .obz board files instead of photos. It is the fastest way to bulk-import vocabulary from other AAC apps and websites—titles, images, categories, and word types are filled in automatically so drafts are ready to Create, with the option to edit anything first.

  1. 1

    Open Board Files from the menu

    Drawer → Board Files. You must be logged in; otherwise the app prompts you to log in or register.

  2. 2

    Choose a category

    Select an existing category from the list, or create a new one. All imported cards in this session are added to that category. For a new category, turn on In Home if you want it to appear on the communicator’s Home grid.

  3. 3

    Upload a board file

    Tap Upload at the bottom and pick a .obf (single board) or .obz (zipped set of boards) file. Each symbol in the file becomes its own card draft—with title, image, category, and word type already filled in from the import.

    Upload a board file

  4. 4

    Review and edit drafts

    Unlike creating cards from photos, imported drafts arrive mostly complete. Tap Next to move through the batch and change anything you want—title, category, word type, or image—before saving. Every card must still pass validation before Create is available.

    Review and edit drafts

  5. 5

    Create

    When all drafts are complete, the button changes to Create. Tap it to save the imported vocabulary to your account. A new category shows up on the Categories tab and on Home if you chose In Home. Otherwise, cards appear in the category you selected.

Tips for caregivers & SLPs
  • Best for migrating from other apps

    Board Files is ideal when you are moving from another AAC system or downloading Open Board Format boards online. You skip typing every label and assigning every word type by hand—import once, skim the drafts, edit exceptions, then Create.

Edit

Reorder03

Reorder cards

Layout changes use Reorder mode on Home and Categories—not casual long-press on the grid. Enter reorder from the dock, drag tiles to new positions, then save with the checkmark.

  1. 1

    Enter reorder mode

    On Home or a category screen, tap the swap-vertical icon on the right side of the dock (login required). The left icon becomes X to cancel without saving.

  2. 2

    Drag cards

    Drag tiles to new positions. Grid guides help with placement.

  3. 3

    Undo, cancel, or save

    While in reorder mode, the dock shows three controls: Undo resets the grid to how it was when you entered reorder mode; Cancel (X) discards changes and exits; Save (checkmark) keeps your changes and exits. ForYou and Search do not support reorder.

    UndoResets the grid to how it was before you entered reorder mode.

Edit04

Edit cards

In reorder mode, each card shows an edit control. The edit modal lets you change the title, category, grammar (word type), and image.

  1. 1

    Enter reorder mode

    On Home or a category screen, tap the swap-vertical icon on the right side of the dock (login required).

  2. 2

    Open the edit modal

    Tap the edit control on a card. The modal shows the current title, category, grammar, and image.

  3. 3

    Update card details

    Change the title, move the card to another category, change the word type, or replace the photo. The save button will appear once a change is made.

    Update card details

Tips for caregivers & SLPs
  • Set word types when editing

    In the edit modal, Word type controls each card’s tint. See Accessibility & Colors for the full palette and colorblind option.

Delete05

Delete cards

Remove cards you no longer need from reorder mode on Home or a category screen. Deletions are saved when you tap the checkmark on the dock.

  1. 1

    Enter reorder mode

    On Home or a category screen, tap the swap-vertical icon on the right side of the dock (login required).

  2. 2

    Delete a card

    Tap the delete control on a card. Confirm if prompted—the card is removed from your layout.

  3. 3

    Save or cancel

    Tap the checkmark on the dock to save deletions. Tap X on the left to discard and keep removed cards. ForYou and Search do not support reorder.

Caregiver Setup

3 articles covered

Profiles01

Managing profiles

Settings (from the drawer) is where caregivers edit the self profile, create child profiles, switch the active profile, and manage the account.

  1. 1

    Open Settings

    Drawer → Settings. Subscription, profile, and app preference sections appear when you are logged in.

  2. 2

    Edit My Profile

    Update display name, birthday, age, gender, and profile notes for the self profile.

  3. 3

    Child Profiles

    Create, edit, or delete child profiles. New child profiles require the caregiver consent switch. Tap Use Profile to make one active.

    Child Profiles

  4. 4

    Account actions

    The Account section shows your email plus Log Out and Delete Account.

Personalization02

Profile notes & personalization

Profile notes and demographics are sent with AI generation so responses fit the active profile. This is personalization for phrasing—not a separate copy of the board per child.

  1. 1

    Add profile notes

    In Settings → My Profile or a child profile, fill in notes about communication style, context, or preferences.

  2. 2

    Switch active profile

    Use Use Profile on another profile when someone else will communicate. Generation uses the active profile’s details.

Tips for caregivers & SLPs
  • Organize the shared board

    Because vocabulary is account-level, use categories and favorites to keep the grid usable for everyone on that account.

Workflow03

Caregiver board workflow

Do heavy setup (import, batch create, reorder) in focused sessions from the drawer while the communicator uses a stable Home layout day to day.

  1. 1

    Import first when migrating

    Board Files → .obf / .obz before spending hours recreating cards manually.

  2. 2

    Add personal cards via Images

    Photos of people, places, and routines make the board concrete. Assign clear categories.

  3. 3

    Reorder in small passes

    Change one category at a time in reorder mode, save, then show the communicator where cards moved.

Teaching & Support

3 articles covered

Teaching01

Teaching someone to use Mosaic Voice

Model the real flow: select cards → check pills in the dock → choose tone → generate → speak. Keep early practice on vocabulary they care about.

Model card selection

Vocabulary02

Growing vocabulary over time

Add cards for recurring topics, let AI handle connective grammar in generated sentences, and use predictions plus history so the communicator does not need every word on the grid immediately.

Add folders for routines

Accessibility & Colors

3 articles covered

Word types01

Word-type colors (modified Fitzgerald key)

Each card has a word type (part of speech) that controls its background tint on grids, in the bottom dock, and in the Word type picker. Mosaic Voice uses a Fitzgerald-inspired palette with extra categories for AAC—tuned for readability on symbol cards.

  1. 1

    What word type does

    Word type sets the card’s color gradient. The subtitle in the picker says: “Part of speech controls card tint in grids.” It is stored as grammar on each card and drives the tint you see everywhere that card appears.

    What word type does

  2. 2

    Choose a type when creating or editing

    In Images (create) or the edit modal during reorder, open Word type and tap a labeled chip with a color swatch—Noun, Verb, Pronoun, Adjective, Preposition, Question, Conjunction, Determiner, Adverb, Important, Negation, Emergency, or Social.

    Create Form

    Edit Form

  3. 3

    Teach color + meaning together

    Many teams use consistent word types so learners can scan by color—e.g. green verbs for actions, orange nouns for people and things. Match your SLP or classroom system when possible.

Tips for caregivers & SLPs
  • Imported boards

    Cards from .obf / .obz imports keep their labels; review word types after import so colors match how you want the board organized.

Swatches match the Word type picker in create and edit flows (card gradients use the same top and bottom stops).

Word typeDefault (Modified Fitzgerald key)Colorblind-friendly
Noun
Noun default swatch #f8c598
Noun colorblind-friendly swatch #f3ca70
Verb
Verb default swatch #addac6
Verb colorblind-friendly swatch #a1d6f4
Pronoun
Pronoun default swatch #ede08c
Pronoun colorblind-friendly swatch #f8f091
Adjective
Adjective default swatch #a4c8ec
Adjective colorblind-friendly swatch #e4b5cf
Preposition
Preposition default swatch #d4b6e3
Preposition colorblind-friendly swatch #73cab3
Question
Question default swatch #baabe4
Question colorblind-friendly swatch #a6b7cc
Conjunction
Conjunction default swatch #dddde2
Conjunction colorblind-friendly swatch #b9c0c1
Determiner
Determiner default swatch #b8c5d2
Determiner colorblind-friendly swatch #dcdfe1
Adverb
Adverb default swatch #c8af9a
Adverb colorblind-friendly swatch #8f9ba6
Important
Important default swatch #cc7c82
Important colorblind-friendly swatch #e9a875
Negation
Negation default swatch #cc7c82
Negation colorblind-friendly swatch #e9a875
Emergency
Emergency default swatch #cc7c82
Emergency colorblind-friendly swatch #e9a676
Social
Social default swatch #d4b6e3
Social colorblind-friendly swatch #73cab3
Colorblind02

Colorblind-friendly word colors

Settings includes a toggle that swaps Fitzgerald word-type colors for a colorblind-safe palette (distinct hues inspired by common accessible color sets). It applies everywhere word-type colors appear.

  1. 1

    Open Accessibility in Settings

    Drawer → Settings → Accessibility. Read the description: it switches Fitzgerald word-type colors for common forms of color blindness.

  2. 2

    Turn on Colorblind-friendly word colors

    Flip the toggle labeled Colorblind-friendly word colors. The choice is saved on your device and restored next time you open the app.

    Turn on Colorblind-friendly word colors

  3. 3

    What changes

    Symbol cards on Home, Categories, and ForYou grids use the new gradients. The Word type picker swatches update too, so create/edit screens match the board.

    modified Fitz (default)

    colorblind-safe

Tips for caregivers & SLPs
  • Try both palettes

    Turn the toggle on with the communicator and see which palette they parse faster. You can switch back anytime without re-tagging cards.

iOS grids03

iOS grid overrides (advanced)

Below Accessibility, Settings exposes optional iOS-only overrides for native grid layout—mainly for motor-planning tuning. Leave fields empty to keep app defaults.

  1. 1

    Find iOS Grid Overrides

    Scroll to the bottom of Settings (logged in). The iOS Grid Overrides section lists optional numeric and color fields for motor-planning grids and on-card controls.

  2. 2

    Adjust or reset overrides

    Each field is optional—leave it empty to keep the screen default. Change individual values to tune row count, button sizes, fonts, or colors. Clear a field to drop that override, or scroll to the bottom of the list and tap Reset All Grid Overrides to restore every value at once.

Leave any field empty in Settings to use the default below. Color defaults follow the active app theme (values shown are for the default mosaic theme).

SettingWhat it overridesDefault
Grid Row CountNumber of rows on iOS motor-planning grids (Home, Categories, ForYou, and Search). Allowed range 1–12.4 rows
Delete Button SizeDiameter of the delete control shown on each card while reorder mode is active.40 pt (16–64)
Edit Button SizeDiameter of the edit control shown on each card while reorder mode is active.40 pt (16–64)
Favorite Button SizeDiameter of the favorite star on grid cards.40 pt (16–64)
Audio Button SizeDiameter of the audio/play control on cards that support spoken labels.40 pt (16–64)
Selection Border WidthStroke width of the highlight border around cards selected in the bottom dock.6 pt (0–12)
Section Header Font SizePoint size for sticky section headers on browse-style grids (for example category group labels).16 pt (10–32)
Title Font SizePoint size for card titles rendered on grid cells.20 pt (10–40)
Edit Card InsetExtra inset applied to shrink cards while reorder mode is on, making room for edit and delete controls.0 pt (0–24)
Delete Button TintColor of the delete button glyph and fill.#c0504d (theme danger)Delete Button Tint color #c0504d
Edit Button TintColor of the edit button glyph and fill.#5094d9 (theme primary)Edit Button Tint color #5094d9
Favorite Button Idle TintStar color when a card is not favorited.#3a4148Favorite Button Idle Tint color #3a4148
Audio Button TintColor of the audio/play button.#14202b (theme text)Audio Button Tint color #14202b
Selection Border ColorBorder color for cards currently selected in the dock pill strip.#4caf50 (theme card selected)Selection Border Color color #4caf50
Section Header Font ColorText color for sticky section headers on browse grids.#14202b (theme text)Section Header Font Color color #14202b

Reference

2 articles covered

Dock01

Bottom dock controls

Quick reference for the floating dock on Home, Categories, and ForYou (some controls hide or change per screen).

  1. 1

    Navigation & layout

  2. 2

    Top bar

    Shortcuts along the top of every screen for menu, home, and creating cards.

  3. 3

    Action bar

    Tap cards on the grid to build a selection. Selected cards appear as pills in the bottom dock—not as a full sentence until you generate one. AI turns your card choices into a speakable sentence after you pick a tone and tap send.

  4. 4

    Undo, cancel, or save

    While in reorder mode, the dock shows three controls: Undo resets the grid to how it was when you entered reorder mode; Cancel (X) discards changes and exits; Save (checkmark) keeps your changes and exits. ForYou and Search do not support reorder.

    UndoResets the grid to how it was before you entered reorder mode.

Launching soon

Ready to try Mosaic Voice?

Sign up for the beta and we'll share setup tips and download details when your spot opens.